
下载
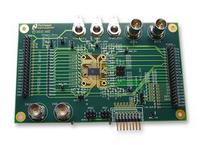
LMP92001 Evaluation Board
User’s Guide
© 2009 National Semiconductor Corporation Page 1 of 5 lmp92001evalboardug_2p2.docxx
1.
Kit Components
Item Qty.
Description
LMP92001 Eval
Board
1 Device evaluation board
SPUSI2 1
USB interface board purchased separately at:
http://www.national.com/store/view_item/index.html?nsid=SPUSI2
2. Software Installation
TinyI2CSPI software, and LMP92001 specific Personality Files, can be obtained from the National
Semiconductor Corp. website. Use the link below to download the self extracting archive and the
installation manual.
http://www.national.com/analog/webench/sensors/spusi2
Follow the instructions and install the software in the Windows XP environment.
When connecting SPUSI2 for the first time to your PC the operating system will attempt to install the
appropriate drivers. Follow the instructions on the screen and allow the wizard to automatically search for
required driver files.
3. Kit Assembly
Equipment needed to conduct basic functionality tests:
• 5V power supply
• DC Voltmeter
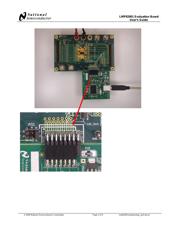
Assemble the kit as follows:
• Connect 5V power supply (power off) to +Vsupply and GND banana sockets
• Connect the SPUSI2 dongle to the LMP92001 Eval Board 14-pin header marked GPSI-14 (watch
the alignment, the Eval Board connector is actually 16-pin, see picture below for correct
alignment)
• Connect USB cable between host PC and the SPUSI2 dongle
Figure below shows the complete assembly: